
Guides · CombiSteel Knowledge Hub
Sizing CombiSteel Stainless Worktables for Equipment and Prep
Guide to sizing CombiSteel worktables for Irish kitchens, supporting safe equipment placement and prep efficiency.
In this guide
You choose a CombiSteel stainless worktable once, then you build daily workflow around it. If the size is wrong, benchtop equipment overhangs, prep space disappears, staff can’t pass safely, and you end up re-buying or compromising on HACCP separation.
This guide helps you size CombiSteel stainless-steel worktables from the Neutral equipment family based on the decisions you actually make in a working kitchen. You check:
- Footprint and clearance: matching table length and depth to your bay, walkways, trolleys and rack movement
- 600 mm vs 700 mm depth: when a compact prep station is enough versus when you need a deeper run for equipment and plating
- Equipment fit and load planning: leaving safe margins around mixers, slicers, countertop fryers and other benchtop units
- Configuration choices: upstand vs flat edge, undershelf vs open base, and when drawers make sense
- Integration: aligning table sizes with adjacent counters, refrigeration and dishwashers to create a continuous, cleanable line
Importance of Correct Worktable Sizing
You notice a badly sized stainless worktable straight away. Prep backs up, equipment overhangs or wobbles, and someone ends up balancing trays where they should not during service. In a busy Irish kitchen, that is not just annoying, it increases the risk of slips, cuts and cross-contamination. Stable, easy-clean work surfaces and sensible separation of raw and ready-to-eat tasks sit at the heart of HACCP routines, as reflected in FSAI guidance for food businesses.
The longer-term cost is less obvious but just as real. If the table is too small or in the wrong place, staff spend more time reaching, double-handling and using “temporary” storage. Benchtop equipment also tends to take more abuse when it is constantly being shifted to make space, or when it is sitting half-on, half-off the surface.
It is worth looking at CombiSteel worktable sizes and layouts with real workflow in mind, not just the available gap. Depth, an upstand, and whether you need under-table storage can change what “the right size” means for your kitchen day to day.
CombiSteel Worktable Options
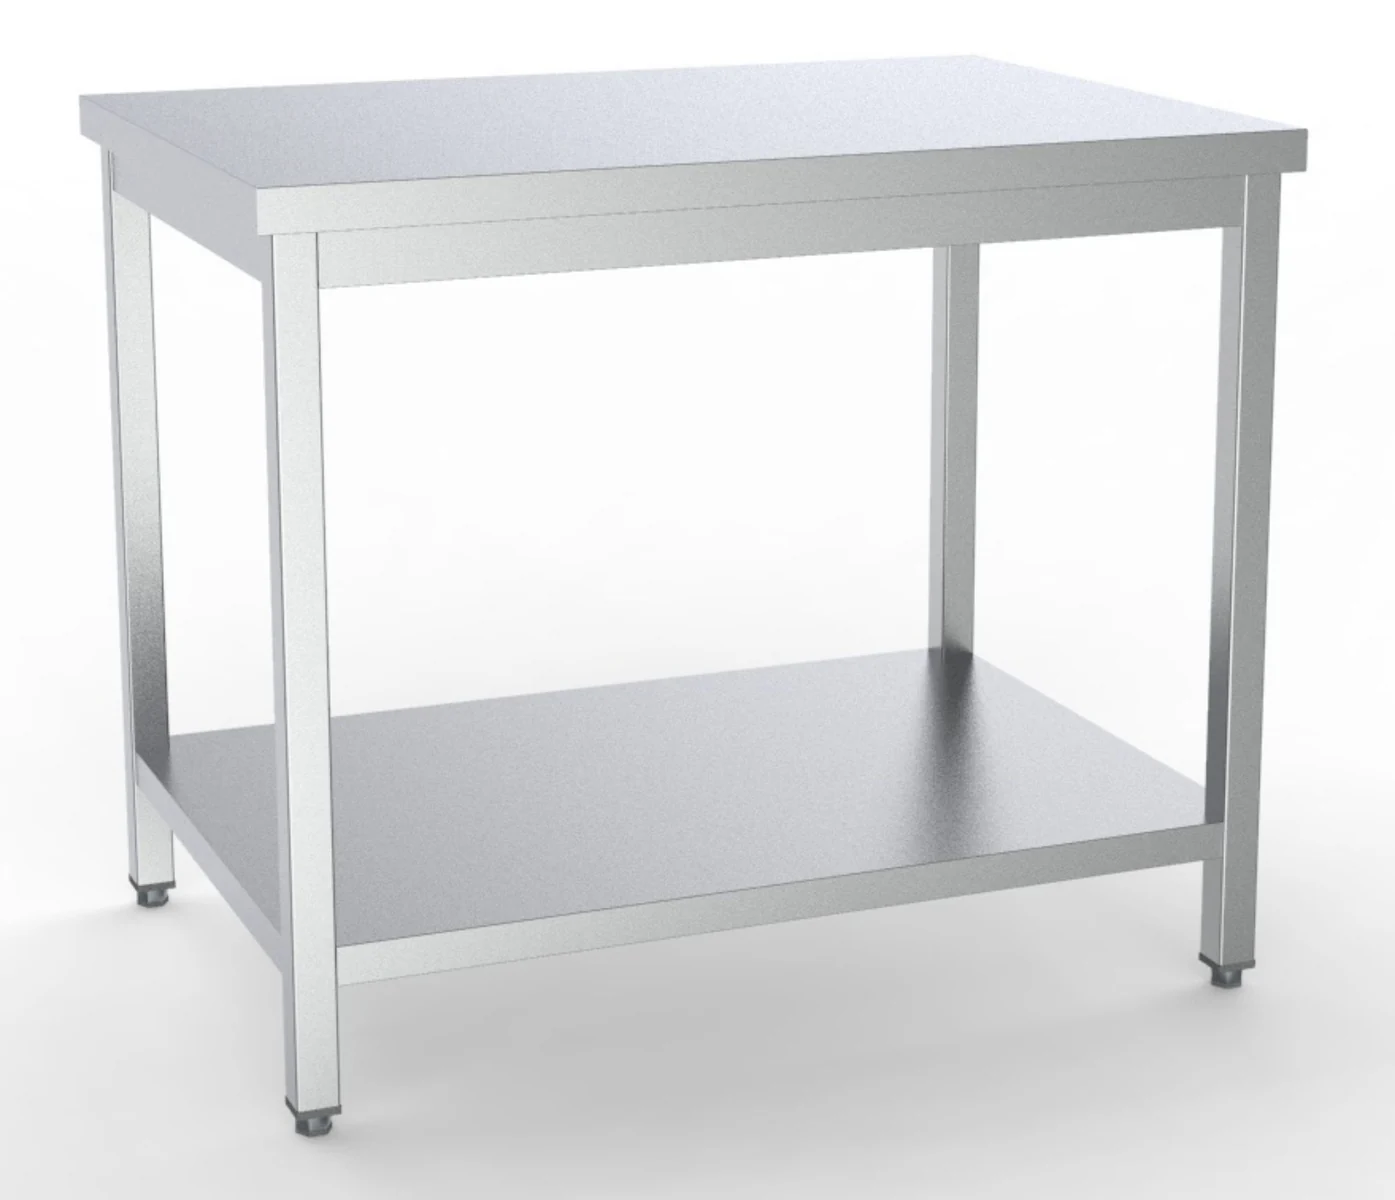
CombiSteel stainless-steel worktables are usually specified by top size (width × depth), then by build: flat edge or upstand, and what you want underneath (open base, undershelf, drawers).
In practice, you’ll see compact square tops for tight prep corners, plus deeper 700 mm-style tables for cookline and heavier prep runs. One point that catches people out is that “same length” does not always mean “same usable station”. Upstands, wall gaps, and under-table storage change how the bench works during service and how easy it is to clean.
Size options you’ll actually be choosing between (width × depth)
For most kitchens, depth is the first filter. It decides whether the bench behaves like a prep station, an equipment stand, or part of a straight stainless run.
- 600 mm depth: suits lighter prep, plating, coffee and sandwich build, and areas where you need a bit more room for staff to pass behind without feeling pinched.
- 700 mm depth: makes more sense where you’re matching other cookline depths, want better landing space in front of equipment, or need room for boards, GN pans and small appliances without overhang.
Length is usually chosen to fit a gap or to create a continuous run. In Irish refits, it often comes down to what will physically fit between a wall return and an appliance while still leaving clearance for doors, drawers, and people carrying crates or racks.
Configuration choices (what changes the job the table can do)
You’re not just buying a flat surface. You’re choosing how the station behaves under pressure and how it will be cleaned.
Common options you’ll see across CombiSteel stainless table listings:
- Flat-top (no upstand): good for island prep, pass-throughs, and anywhere you want to wipe straight off the back edge.
- Upstand: suits benches pushed to a wall where liquids, sauces, coffee grinds, or flour would otherwise end up down the back.
- Open base vs undershelf vs drawers: choose based on whether you need knee room, quick-grab storage, or a tidier look on a customer-facing line.
A shelf is useful for trays, small appliances and sealed goods, but it also becomes a second surface that collects splashback and debris unless it’s treated as part of the cleaning routine.
Upstand vs flat edge: when each makes more sense
If the bench is tight to a wall, an upstand usually saves time and mess, especially behind coffee, mixers, slicers, and anywhere liquids are in play.
If you’re building a prep island, working both sides, or regularly sliding GN pans and boards off the back to a runner or pass, a flat edge can be more practical. It’s also easier to clean properly because you can access all sides.
A common mistake is specifying an upstand where you later need the bench to sit flush to another piece of equipment or under a shelf system. If you expect the layout to change, flat-top tables tend to be the safer option.
Undershelves, drawers, and open base: what to prioritise
- Undershelves work best when stock is kept in closed containers and someone actually maintains order. They’re handy in cafés and delis for backup packaging, small equipment, and labelled ingredient tubs, but they can slow down floor cleaning if the shelf becomes “permanent storage”.
- Drawers suit portion tools, utensils, wrap, labels and smallwares you need during service without stepping away from the station.
- Open base is often right in tight spaces where you need bins, trolleys, roll-under access, or leg room for longer prep tasks.
How the tables fit with the rest of the CombiSteel stainless range
CombiSteel worktables sit in the neutral equipment family alongside stainless shelving, sinks and storage. You’ll get a better result if you size the table with the surrounding stainless in mind, rather than treating it as a standalone bench.
If the table is part of a longer run, small details decide whether it feels properly planned: upstand continuity, shelf heights, and whether you’ve left realistic cleaning access where benches meet walls, legs, and adjacent units.
Choosing the Right Depth and Length
Start by being clear what the table is doing in that exact spot: active prep, a landing zone, or supporting benchtop equipment. Then measure the real footprint, including door swings and the space people actually use when they turn, lift, and pass each other.
As a rule, pick depth based on reach and containment for prep versus stable support for equipment. Set length to join up neatly with surrounding appliances and walls, without creating dead gaps. Finally, sanity-check hygiene flow and cleaning access, because a “perfect” measurement on paper can turn into a daily bottleneck once service starts.
1. Define the job of the table in that exact bay
A worktable used for plating and cold prep needs a different setup to a table that’s basically an equipment stand for a slicer, mixer, contact grill, or countertop fryer.
- For hands-on prep, you’re balancing usable surface area with reach, spill containment, and how often staff are leaning across the bench at speed.
- For supporting equipment, work back from the equipment footprint first. You want the machine feet fully on the top, enough room to wipe and clean around it, and safe space for loading and unloading. Not “it fits if you squint”.
2. Choose depth to suit the work: 600 mm vs 700 mm thinking
Depth comes down to two practical questions:
- how far staff have to reach during prep, and
- how securely equipment sits when you’re working quickly.
In cafés, delis, and sandwich lines, a shallower depth often keeps everything within easy reach, especially where staff are constantly turning between the bench, undercounter storage, and refrigeration.
In busier prep kitchens and pastry sections, a deeper table can feel more workable for large boards, mixing bowls, gastronorms, and trays, without feeling like you’re always working on the edge.
On cooklines, depth also needs to match what’s behind or above the table:
- If the table sits against a wall under shelving, too much depth can push the working edge into the walkway.
- If it’s acting as an equipment stand, extra depth can give a safer stance for heavier benchtop kit and reduce the temptation to “park” items half-on, half-off during service.
3. Set the length by building a continuous run, not a series of gaps
Length selection is easiest when you treat the bench as part of a run with other fixed-width items: undercounter fridges, dishwashers, ovens, or pass counters.
Measure the full wall or bay, subtract immovable obstacles and any required access space, then aim for a clean line that’s easy to wipe down.
Avoid leaving narrow gaps between appliances and tables unless you have a genuine reason. In a working kitchen they become crumb traps and slow you down, because someone still has to pull equipment out to clean them properly.
4. Allow for people, trolleys, and “busy moments” around the bench
A table can “fit” and still fail operationally if it blocks circulation when staff are carrying hot trays, moving racks, or opening fridge and dishwasher doors.
Check the approach and exit routes around the worktable. Then picture two people passing during service with a tray, a bus box, or a rack.
Also check what happens when storage is in use. If you’ll be accessing underbench shelves, doors, bins, or drawers constantly, that changes where the table ends can sit relative to door swings and corners.
5. Keep HACCP flow and cleaning access realistic
Table sizing affects food safety in a very practical way. Depth and length influence whether you can keep raw and ready-to-eat activity properly separated at the bench, which is a core control for cross-contamination in day-to-day operations, as reflected in the FSAI’s guidance on separating raw and ready-to-eat food: https://www.fsai.ie/business-advice/running-a-food-business/food-donations/on-street-food-donation/requirements-for-different-stages-of-the-process
Before you lock in size, confirm staff can clean behind and under the bench in your actual layout. Also check that your chosen length doesn’t force raw handling to creep into a ready-to-eat area simply because it’s the only spare surface near the pass.
Once depth and length are pinned down, it’s much easier to choose the right CombiSteel configuration details, such as an upstand, undershelf, drawers, or an open base, to suit how you work day to day.
Load Capacity Considerations
Benchtop kit can put a surprising amount of stress into a stainless worktable. It is rarely just the headline weight. Vibration, shock loads, heat and off-centre placement can twist a top, rack a lighter frame, and leave you with an unstable station or inaccurate prep.
Under Irish safety expectations, work equipment needs to be suitable for the job and the conditions of use, including stability and maintenance. The HSA’s guidance on the use of work equipment is a sensible reference point here: source document · PDF
How to judge whether a table will safely take your equipment
Start with the equipment, not the table. You are checking (1) total working weight and (2) how that weight is transferred into the top and frame.
Use this quick check in a real Irish kitchen context where floors are not always perfectly level and benches take plenty of knocks:
- Confirm the working weight, not just the dry weight. Add product loads and consumables: a full mixer bowl, a slicer with product on the carriage, oil in a countertop fryer, or a filled water reservoir.
- Look at the footprint and feet pattern. Four small feet can create high point loads. A full base spreads weight and is usually kinder to the top.
- Position heavy kit over the legs. Avoid loading the corner of a table or hanging weight off one side. If it has to sit off-centre, you need a stiffer frame and proper bracing.
- Allow for dynamic loads. Mixers, dough rollers, and heavy chopping introduce vibration and shock that a static “kg rating” does not capture.
- Think about what you are fixing to the table. Brackets, splashbacks, dispensers and salamanders can add stress at fixing points and complicate cleaning if not planned.
If you cannot find a verified load rating for the exact CombiSteel table variant you are considering, treat that as a reason to pause. Either move to a heavier-duty build, or get model-level confirmation before you commit.
Point loads, heat, and why “it fits” is not the same as “it’s suitable”
Some kit causes trouble because it concentrates weight into small areas or adds heat.
Countertop fryers and grills can radiate heat downwards. That matters if you are storing plastic tubs, packaging, or chemicals on an undershelf. Even without heat, a table that feels fine for plating can be the wrong support for a heavy mixer if:
- the top “drums” or flexes,
- the legs walk on the floor,
- the machine visibly vibrates during production.
Levelling feet help you level the bench, but they do not solve an unstable load case. If you have to wind feet out a long way to meet the floor, stability usually drops, and so does the real-world safe load.
Undershelves and drawers: what they change from a load point of view
An undershelf can help stiffness if it properly braces the legs. It also encourages dense storage (tins, flour, oil) directly under the heaviest equipment. That can be fine when weight is spread and kept low, but it increases the consequences if a leg gets knocked out of level, or if castors are fitted later.
Drawers are mostly a workflow decision, but they change loading too. Staff leaning on an open drawer or repeatedly slamming it during service adds side loads. On lighter frames, that is the sort of daily abuse that slowly pulls a table out of square.
These decisions feed directly into which CombiSteel worktable options suit your line (upstand, shelf, drawer sets, open base), especially where you have vibrating kit or heavy benchtop cooking.
Additional Features and Accessories
What you add to a stainless table depends on the job it’s doing: a prep surface, an equipment stand, or part of a longer run. In Irish kitchens, HACCP routines and audits usually favour choices that reduce dirt traps and make cleaning straightforward. The FSAI notes that food contact surfaces should be smooth, impervious, hard-wearing, and easy to clean and disinfect in its Guide for small meat manufacturing plants. The right accessories still come down to your layout, what’s stored under the bench, and whether the table sits against a wall, between appliances, or on an island.
Upstands (rear splashbacks): useful against walls, awkward in a run
Choose an upstand when the table sits tight to a wall and you want to protect the wall finish from constant wiping, splashes, and spills creeping down the back. In a busy café or takeaway line, it also reduces the risk of GN lids, jars, or small pans being pushed off the rear edge during service.
Skip the upstand when you need a flush, continuous surface beside another bench or counter. If you’re building a straight prep run, an upstand can leave you with an unwanted “step” where crumbs and liquids collect and where staff end up improvising covers or bridges.
Undershelves: extra storage, but only if you can keep it clean
An undershelf is often the most useful add-on because it adds storage without increasing the footprint. It suits back-of-house prep where you want bulky items close by, such as mixing bowls, small appliances, flour tubs, or backup packaging.
The trade-off is housekeeping. If you park open food, wet cloths, or anything that drips underneath, the shelf quickly becomes a problem area. In practice, undershelves work best for clean, sealed, dry storage. Make sure you still have enough clearance to mop properly, especially on older, uneven floors.
Drawers vs open base: workflow first, tidiness second
Drawers suit stations where you need control over small tools and consumables, and where you want to limit splash and steam getting into everything. They also help the bench look presentable if it’s doing front-of-house duty as a coffee station or garnish point.
An open base suits high-tempo prep where staff are constantly grabbing tubs, small bins, or appliances and you don’t want anyone fighting drawers mid-rush. It also makes it easier to spot spills early and clean quickly.
- Upstand: best against a wall for protection and fewer gaps; avoid it where you need benches to butt together into a continuous run.
- Undershelf: good for sealed, dry or bulky items off the floor; avoid it for anything that leaks, sheds crumbs, or encourages clutter.
- Drawers: good for tool control and a tidy station; choose open base if you need fast access to larger tubs, bins, or small appliances.
Practical extras buyers miss: levelling and install time
Height-adjustable feet are not exciting, but they matter in Ireland where floors are often out, particularly in older pubs, basements, and converted units. If you’re placing countertop equipment on the bench, levelling is about safe operation and stability as much as it is about appearances.
Allow time for assembly and for removing protective film. If film gets trapped at joints or under fixings, it’s slow to tidy up after the bench is already wedged into place. If you’re fitting a full run, it’s worth doing assembly and film removal with clear access before anything is pushed back to walls or locked between other equipment.
These choices are easiest to get right when you match them to the CombiSteel table configuration you’re considering, particularly depth and whether you’re building a modular run or a single standalone station.
Integrating Worktables with Existing Equipment
Start by being clear what the table needs to do beside each appliance, then measure the real pinch points in the line: available length, usable depth, and finished working height. Choose a depth and rear edge style (upstand or flat) that suits the wall and the service side, then confirm you still have access to plugs, isolators and cleaning gaps. Before you order, check the plan against your HACCP separation and cleaning routine. A neat run is no good if it pushes raw and ready-to-eat prep onto the same surface, which is flagged as a cross-contamination risk in FSAI good hygiene practice guidance: FSAI Guide to Good Hygiene Practice for catering/retail.
1. Define the table’s job beside each appliance
If the worktable is acting as an equipment stand (mixer, countertop fryer, slicer, vac packer), you are sizing for stability, safe loading and service access. If it is a landing or plating section between appliances, you are sizing for speed: where hot trays land, where staff pivot, and where packaging or dockets end up during a rush.
Most layout problems come from treating a worktable as “extra space”. A table that’s fine for veg prep can be a nuisance beside a dishwasher if it blocks clear infeed/outfeed, or beside a grill if it creates a hot choke point and makes cleaning harder.
2. Measure the line properly, including what usually gets missed
Measure with the kitchen set up as it actually runs, not when it’s empty. You are trying to fit the table between equipment without stealing access panels, door swing or daily cleaning space.
- Measure usable length wall-to-wall (or equipment-to-equipment) at floor level and at worktop level. Skirting, pipes and trunking can change what fits.
- Measure depth you can genuinely use without turning the aisle into an obstacle course for staff, GN trolleys and dish racks.
- Measure finished working height against adjacent counters so you do not introduce an awkward step up or down that slows prep and increases spill risk.
- Note obstructions: sockets, isolators, water points, floor drains, extraction canopy uprights, and door swing on fridges and undercounters.
3. Match depth to the equipment footprint and the operator position
For equipment stands, depth is about footprint, overhang and where the operator stands. A slicer or contact grill too close to the front edge is uncomfortable and risky under pressure. Too far back and staff are reaching all day.
For cookline integration, extra depth can be useful as landing and portioning space, but only if the aisle can take it. For cold prep and assembly (sandwiches, salads, desserts), depth often pays back because you can keep containers, scales and wrap to hand without stacking everything on the pass. For pot wash, depth and edge details matter because water management becomes a daily job.
4. Choose upstand vs flat edge based on walls, cleaning and how the run joins up
An upstand usually makes sense when the table backs onto a wall and you want to stop debris and liquid dropping behind the line. A flat edge is often better for island stations, back-to-back tables, or where you need a continuous surface across multiple units and pass-through points.
Think about the joins as well. A tidy run on day one can turn into a crumb and grease trap if gaps open up. Plan how you’ll align and seal joins, or allow deliberate separation for cleaning access, rather than relying on “it’ll be grand”.
5. Keep access for cleaning, servicing and utilities
When a worktable sits tight against refrigeration, dishwashers or cooking equipment, it can block the things you need to reach most: plugs, water connections, waste, ventilation paths and service panels. In reality, that becomes “we never move it”, and then breakdowns take longer and hygiene slips because staff cannot clean behind or under the line properly.
If you’re lining up tables with existing undercounter fridges or dishwashers, check where the unit vents and where heat and steam discharge. Your table choice should not turn a simple clean-down or service check into a lift-and-shift job.
6. Plan separation zones on the run for HACCP-friendly workflow
If you handle raw and ready-to-eat foods at the same time, separation needs to be built into the layout, not left to good intentions on a busy weekend. In practice that can mean separate tables for raw prep and ready-to-eat prep, or a run where the “raw end” is clearly distinct, with its own tools, containers and cleaning routine, in line with FSAI good hygiene practice guidance: FSAI Guide to Good Hygiene Practice for catering/retail.
Once the table position is right, the final step is choosing the configuration that matches how your team works: undershelf, drawers or an open base, and whether you need an upstand for the section of the line it’s going into.
CombiSteel Ecosystem and Support
Sizing a CombiSteel stainless worktable works best when you treat it as part of a full station and service run, not a standalone purchase. Clearances, hygiene zoning, and under-bench storage all decide whether the table actually works under pressure. The Food Safety Authority of Ireland’s HACCP guidance is clear on the need for controls to prevent cross-contamination, which in practice means planning bench space and positioning so raw and ready-to-eat work stay separate.
A table can look perfect on a drawing and still fail in a real kitchen if it narrows the walkway, forces stock onto the floor, or leaves no access for proper cleaning.
Fit the table into a station, not a gap
A worktable only earns its keep if it supports a specific job: veg prep, portioning, plating, coffee side prep, pass support, or acting as an equipment stand. Size it around the station footprint:
- operator space in front of the bench
- the reach zone for ingredients and smallwares
- landing space either side of equipment (trays, baskets, plates)
In many Irish kitchens where space is tight, depth is often the make-or-break dimension. Too deep and you lose flow. Too shallow and you end up parking trays wherever they fit, usually where they should not.
Use HACCP zoning to decide table runs and upstands
If you are building a run of tables, sizing becomes a hygiene decision. You are defining where raw handling ends and ready-to-eat starts. The simplest control is physical separation and dedicated bench space for each task, which aligns with the control-based approach in the FSAI HACCP guidance for food businesses.
Upstands help where a bench is tight to a wall and you are trying to stop spills and debris dropping behind equipment. A flat edge is often the better choice at pass-throughs, island stations, or anywhere you need two-sided wipe-down and clean joins between units.
Match table lengths to adjacent CombiSteel equipment and utilities
In practice, table size is usually constrained by what it has to line through with: refrigeration counters, undercounter fridges, dishwashers, ovens, doors, and service routes. Measure the real available span between end panels, wall finishes, and pipework, then allow sensible clearance for:
- plugs and cable exits
- isolation valves and access panels
- future maintenance access
Tight installs tend to become uncleanable installs. If you are building a continuous line, avoid small filler gaps (often 20 to 40 mm) that turn into crumb traps and add cleaning time every day.
Where CombiSteel support helps, and how to use it properly
CombiSteel stainless tables sit within the CombiSteel neutral equipment family. That matters when you are trying to keep a consistent spec across tables, shelving, sinks and storage, and avoid a mixed install that never quite lines up.
On the Caterboss side you will see multiple stainless table options where the practical buying choices are width and depth, undershelves or drawers, and upstands. Before you sign off, use CombiSteel.ie the same way you would for refrigeration or warewashing: confirm what accessories are available within the range, check any model documents linked on the listing, and plan delivery access and assembly time so a bench does not delay commissioning.
Quick integration check before you commit (the stuff that causes rework)
- Confirm the station purpose and equipment footprint first (including overhangs, feet positions, and cable exit points), then set table depth and length around that.
- Allow working clearance in front for the task and the traffic you actually have at peak.
- Decide whether under-table storage improves speed or creates knee-bash and blocks cleaning access.
- Choose upstand versus flat edge based on whether the table is against a wall, part of an island, or meeting other units in a run.
- Plan for levelling on real floors and for cleaning reach behind and underneath, because hygiene and maintenance time are operating costs.
That planning context makes individual CombiSteel configurations easier to compare when you start looking at specific worktable options and the add-ons that change how they work on the line.
FAQs on sizing CombiSteel stainless worktables
What sizes do commercial stainless-steel worktables come in?
Commercial stainless-steel worktables are typically specified by width × depth (mm), with options like 600×600 mm for tight spaces and 700 mm deep ranges for fuller prep and equipment support. Within CombiSteel’s neutral equipment family, you’ll commonly choose:
- Depth: compact 600 mm or roomier 700 mm lines (often used for heavier prep and larger countertop equipment).
- Width: multiple lengths to build a continuous run alongside other equipment.
- Top details: flat edge or upstand.
- Base configuration: undershelf, drawers, or open base.
If you are matching an existing line, measure the available bay and then work backwards from the depth you need for the task (prep versus equipment landing).
How do I choose the right size worktable for different kitchen areas?
Start with the job the table must do in that zone, then size for workflow, clearance, and equipment footprint:
- Cookline landing and plating: Choose a depth that won’t force hot pans or trays to sit on the edge. A deeper (often 700 mm) table is usually easier for pass-through and landing space.
- Cold prep and portioning: Prioritise usable top depth for boards, GN pans, scales, and wrap space. If you prep in volume, deeper tops reduce clutter and cross-contact risk.
- Pot wash and dish drop: Size to the rack or tub you’re handling, and keep edges clear for stacking. If the table sits against a wall, an upstand helps protect wall finishes.
- Equipment stands (mixers, slicers, countertop fryers): Size so the full footprint sits on the top with a safety margin. Avoid overhangs and ensure the table height and stance feel stable.
Practical planning tips that prevent expensive mistakes:
- Measure wall-to-wall and subtract clearance for doors, drawers, and staff movement.
- Check service access for nearby appliances so the table does not block panels or ventilation.
- If you may add equipment later, select a size that gives you a little spare landing space rather than a perfect, tight fit.
Is it better to have an undershelf or open base for a worktable?
It depends on whether your priority is storage or cleaning access and leg room:
- Undershelf: Best when you need fast access to pots, small appliances, GN pans, or ingredients. It helps keep the top clear and can reduce trips to storage. Choose this for prep stations where you want a “work triangle” on one footprint.
- Open base: Best for bins, mobile ingredient tubs, or frequent floor cleaning, and it can feel less cramped for tasks where staff stand close to the table for long periods.
If you are placing equipment under the table (bins, small fridges, or trolleys), confirm the internal clear opening you need and choose the base style accordingly. For HACCP-friendly routines, make sure whatever you store underneath can be removed easily for cleaning.
Next step: match the right table to your kitchen line
If you’re planning a new prep station or replacing an old bench, use the sizing approach in this guide to shortlist the right depth, width, and base configuration for your workflow.
When you are ready to compare real purchase options by size and configuration, you can browse CombiSteel stainless-steel tables on Caterboss and ask a Caterboss advisor to sanity-check the fit for your kitchen layout.