
Ventilation · CombiSteel Knowledge Hub
Commercial Kitchen Extraction: Prepare the Brief Before You Buy a CombiSteel Canopy
Learn how to prepare a ventilation brief for commercial kitchens using CombiSteel canopies, ensuring optimal efficiency and compliance.
In this guide
If you buy a canopy on width alone, you risk rework, poor capture, awkward duct routing, and an installation that is hard to clean.
This guide shows you how to brief commercial kitchen extraction in a way a contractor can design and price properly, using three CombiSteel reference models.
You will see why two same-width 1200 mm canopies, CombiSteel 7227.0100 and CombiSteel 7088.0010, can drive very different builder’s work and duct routes because their depth and duct connection size differ. You will also see how to anchor your appliance schedule to real equipment geometry, using the CombiSteel 7178.3010 six-burner gas range as a reference point.
Introduction to commercial kitchen ventilation
A commercial kitchen ventilation brief is the pack you give a ventilation designer or contractor so they can design and price an extraction system that matches how your kitchen runs.
A useful brief ties together:
- what you cook and when (your peak load)
- what sits where on the line (real appliance geometry)
- what the building will allow (routes, penetrations, access)
- how the system stays clean and serviceable
The point is simple: “a 1200 mm hood” is only a width. Capture, duct routing, fan selection, noise, and maintenance access depend on your menu, your line, and the building constraints, not the headline measurement on a listing.
Why the brief matters day to day
If the brief is vague, the result is usually vague too. You can end up with a canopy that looks fine on a drawing but struggles at busy times, or ductwork that is technically installable but awkward to access.
In kitchens where back-of-house space is tight, the brief is where you protect:
- staff comfort on the line (heat and fumes staying where they should)
- prep and pass areas (less spill of vapour and grease)
- airflow balance, so doors and service hatches are not doing the job of planned make-up air
A clear brief also reduces redesign. If constraints are stated early, the contractor can propose a workable route, allow for access points, and price the job properly instead of discovering issues after equipment is ordered.
Comparing CombiSteel extraction hoods (same width, different build impact)
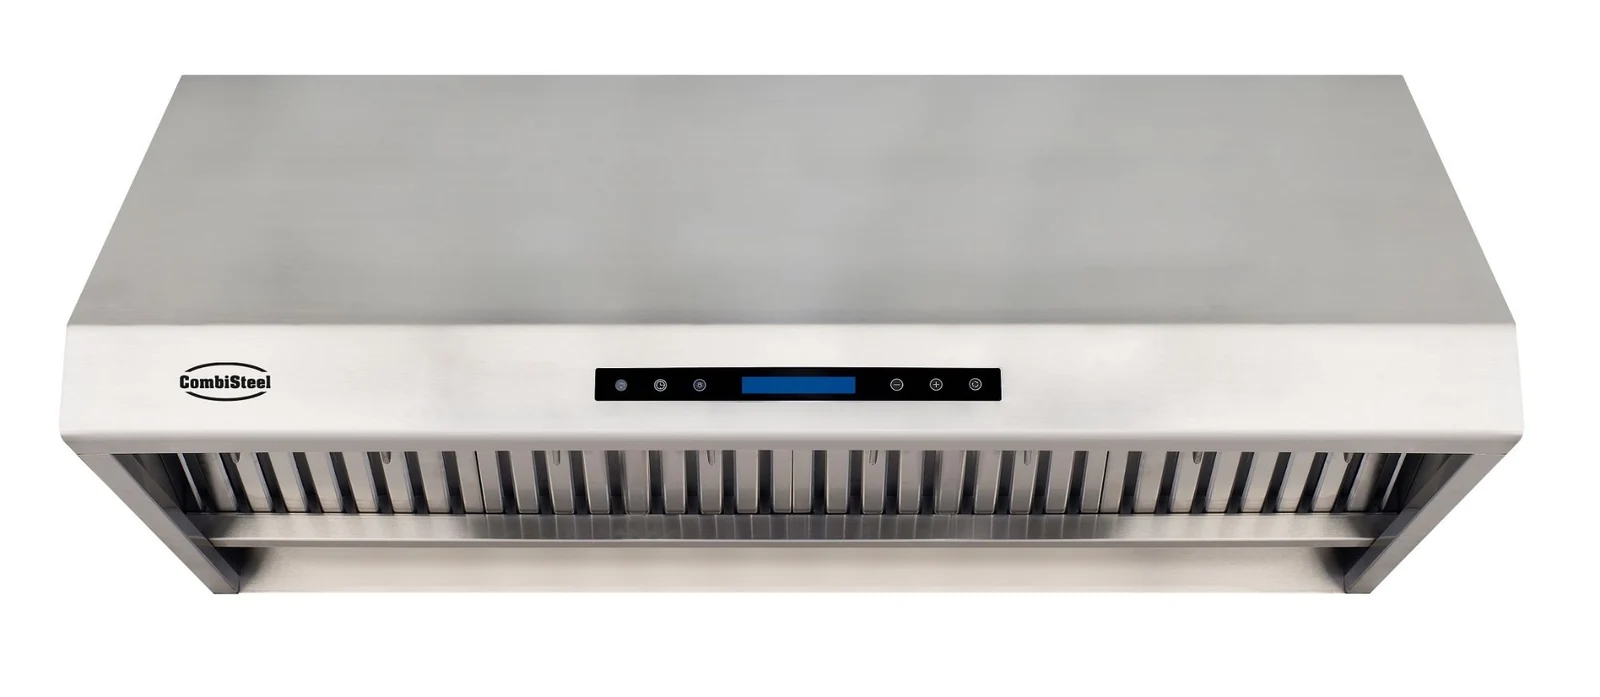
If you are choosing between these two 1200 mm wide CombiSteel canopies, the decision is rarely about width. It is about depth and duct connection size, and what that means for routing, penetrations, headroom, and cleaning access.
Quick comparison (verified listing specs)
Swipe or scroll horizontally to see all table columns.
| Model | Width | Depth | Height | Duct connection | Listing |
|---|---|---|---|---|---|
| CombiSteel 7227.0100 | 1200 mm | 630 mm | 457 mm | 200 mm | CaterBoss 1200 extraction hood specifications |
| CombiSteel 7088.0010 | 1200 mm | 900 mm | 450 mm | 350 mm | CaterBoss complete wall mounted hood 1200 mm 2000 m3h specifications |
A move from 630 mm depth and a 200 mm connection to 900 mm depth and a 350 mm connection can change:
- where the duct can physically run (especially in tight ceiling voids or around services)
- the size of penetrations through ceilings and walls
- how much working clearance you have in front of the hood
- whether you can keep sensible access once boxing-in is done
Keep one thing straight at brief stage: the connection size on a listing is a product detail, not the duct design. Your contractor still has to design the system around your cooking duty and the building route.
What the numbers mean for coordination
- A shallower canopy can be easier to fit where there are tight voids, existing services, or limited space in front of the cookline.
- A deeper canopy pushes earlier decisions on clearances and duct routing. The larger connection size can also drive larger penetrations and boxing-in.
None of that tells you which hood will “perform better” on your line. It tells you what each model will demand from the building, and what needs to be resolved before you order.
A geometry reference point from the cookline
A 1200 mm hood often ends up over a 1200 mm appliance. As a simple depth sense-check, the CombiSteel 7178.3010 six-burner gas range is listed at (H)900 x (W)1200 x (D)900 mm:
CaterBoss base 900 freestanding gas cooker range 6 burners specifications
That 900 mm appliance depth is why canopy depth and duct routing should be sanity-checked early, not after ceilings are closed.
What to do at enquiry stage
Treat 1200 mm width as a layout starting point only. For pricing, list your canopy as a named candidate model (or list both) and ask the contractor to confirm what changes in:
- the duct route and builder’s work
- penetrations and boxing-in
- access for cleaning and service
The “best” choice depends on your cooking duty and the route the building will actually allow. The brief is how you get those decisions recorded and priced.
Creating an effective ventilation brief
Before you compare canopy prices, send a brief that lets each bidder price the same job. The contractor still has to do the airflow design. Your job is to remove ambiguity around geometry, routes, access, and noise priorities.
1. Lock the layout items you will not change
Start with a dimensioned plan showing the cookline, pass, wash-up, doors, and any open-kitchen sightlines that limit mounting height.
Call out:
- finished ceiling heights and any bulkheads/soffits
- beams and services that will block duct runs
- fixed items you cannot move (doors, fire exits, structural walls)
If the cookline order and spacing is still moving, align it first. Ventilation design based on “approximately here” equipment positions is where cost and delays creep in.
2. Build an appliance schedule using real model geometry
Give your contractor an appliance schedule tied to the exact cooking equipment you are installing, with model numbers and positions.
Do not guess your peak load. State what realistically runs together during your busiest period (for example, a 10 to 15 minute window).
Example geometry reference:
- CombiSteel 7178.3010 gas range (6 burners): (H)900 x (W)1200 x (D)900 mm
If you are still iterating the line, keep the schedule in a table you can re-issue with revision notes.
For a cookline planning format a designer can scan quickly, see: Plan a commercial cooking line.
If your line includes griddles, note the cooking surface type (smooth vs ribbed) in the schedule. In practice it affects grease and vapour behaviour, which affects what the extraction has to cope with. This detail often goes missing when people only list “griddle 1200”: CombiSteel smooth or ribbed griddle plate.
3. Name canopy candidates, and include the geometry that affects the build
When you request a design, list any candidate hood models and include their key dimensions.
Use the table above, and label these as candidate canopies. Ask the contractor to confirm what changes if you pick one versus the other.
Do not treat the hood connection size as “the duct design”. It is one coordination point that can drive penetrations and space claims.
4. Set out route options and the constraints that decide between them
Contractors can only price properly when they understand what the building will allow. Provide photos and notes on:
- roof access and where penetrations might be possible
- landlord or centre-management constraints (common in multi-tenant units)
- where a fan could go without blocking service access
- any visible clashes already in the ceiling void
Write this as options with decision constraints, not a single demanded route.
Worked example (hypothetical): pricing two route scopes, not two canopy widths
Below is a deliberately simple example you can paste into an email enquiry. It avoids airflow numbers and focuses on scope and coordination.
Appliance schedule excerpt (peak use):
- 1x CombiSteel 7178.3010 gas range, 6 burners, W1200 x D900 x H900 (reference geometry):
Candidate canopies (choose one, or price both):
- CombiSteel 7227.0100, W1200 x D630 x H457, connection 200 mm:
- CombiSteel 7088.0010, W1200 x D900 x H450, connection 350 mm:
Route option A: short/direct to roof (price if feasible)
- Proposed route: straight up from canopy into roof space and out.
- Coordination points to price and confirm:
- roof penetration position and weathering details
- fan position that remains serviceable (not buried above a closed ceiling with no access)
- how access for cleaning is provided at the first change of direction and near the fan
Route option B: longer route to a permitted discharge point (price as fallback)
- Proposed route: horizontal run above ceiling to a permitted riser or discharge point.
- Coordination points to price and confirm:
- where boxing-in is acceptable (and where it is not)
- access panel locations along the run so duct cleaning remains possible after fit-out
- any builder’s work openings needed through fire-rated partitions and how they will be made good
Two priced route options usually beats a single quote that is mostly “subject to survey”.
5. Define what you want shown on drawings (so access does not get lost)
Ask bidders to show the coordination items that tend to cause pain later:
- duct route and where it will be boxed-in (if at all)
- proposed access panel locations
- fan and isolator locations and how they’re accessed
You are not telling them how to build it. You are making sure maintainability is designed in, not promised after the fact.
6. Compare like with like on scope
Ask every bidder to state exactly what they are including. Otherwise you end up comparing a canopy-only number with a complete package.
At minimum, have them confirm whether their scope includes: canopy supply, fan, speed control, make-up air provision, ducting, commissioning, and handover documentation.
Integrating fresh air and exhaust systems
Coordinate fresh air supply with extraction. An extract system that removes air without a planned replacement path will pull the kitchen into negative pressure. That reduces capture and starts drawing air in through doors, hatches, and gaps.
In practice, you may want the kitchen slightly contained compared to front-of-house for odours. The problem is when containment turns into the canopy fighting the building instead of capturing cooking fumes.
What negative pressure looks like during service
- a back door that suddenly feels heavy to open or slams shut
- whistling around a pass-through
- the potwash area becoming the main air inlet for the whole kitchen
That uncontrolled incoming air can cut across the front of the canopy and interfere with the rising cooking plume.
How to brief supply air without designing airflow rates
You do not need to specify airflow rates. You do need to state practical constraints:
- where supply air can enter (and where it must not)
- areas you need to protect from odours (open-kitchen sightlines, serving counters)
- where people stand at the pass and hot line (a cold draught will be noticed immediately)
If supply points are aimed across the front edge of the hood, you can create turbulence that pushes vapour and grease back into the kitchen. Capture depends on calmer air at the canopy edge.
Regulatory standards and compliance
Commercial kitchen extraction is judged as a system: canopy, ductwork, fan location, access for cleaning, and how the installation is documented.
For a buyer, the practical takeaway is that compliance-driven items often look like boring coordination details:
- duct routes through the building
- access panels that remain reachable after ceilings are closed
- safe access to filters and isolators
- clear scope lines (what is included, what is not)
If you treat compliance as system scope, you will compare canopy options based on what they force you to do in routing and access, not just what fits the wall.
Checklist creation and coordination
What you send at first enquiry often decides whether you get a tight, comparable quote or a lot of caveats.
A one-page contractor checklist you can send with your first enquiry
Keep this to one page (email or PDF). Make it easy to fill in, and include photo placeholders.
- Site and contacts: venue name, Eircode, site contact, access times, landlord or centre-management restrictions, who approves variations.
- Kitchen basics: room dimensions, ceiling height, wall build-ups where the canopy fixes, and obstructions (beams, services).
- Cooking line appliance schedule (model-led): list each appliance by make and model, fuel type, and position.
- Example reference geometry: CombiSteel 7178.3010 is listed at H900 x W1200 x D900:
- Canopy candidates (record known geometry): list model number, width, depth, height, and duct connection size.
- Duct route constraints (you provide, contractor designs): preferred discharge point, penetration options, any must-avoid zones, and whether you can accept internal boxing-in.
- Make-up air and comfort constraints: where fresh air can realistically come from and any “no draught on the pass” requirements.
- Noise sensitivity: dining adjacency, bedrooms overhead, courtyards, shared laneways.
- Cleaning and access: any areas that must stay accessible after fit-out (access panels, fan, isolator), and any “must not box-in” notes.
- Programme and handover: target opening date and what you want at handover (as-fitted drawings and operating notes).
How to coordinate responsibilities without muddying the design
Your job is to remove avoidable ambiguity: exact equipment models, intended positions, constraints you cannot change, and priorities around noise and access.
The contractor or designer’s job is to turn that into a design: airflow rates, hood selection, duct sizing, fan choice, termination details, and commissioning.
If you want one place to keep your appliance list tidy (and easy to reissue), use the same structure as: Plan a commercial cooking line.