
Cooking · CombiSteel Knowledge Hub
Plan a CombiSteel Cooking Line Around Your Busiest Service
Plan a CombiSteel cooking line around the busiest 30–60 minutes by counting occupied cooking positions, then assigning them across a range, fry top and fryer without guessing footprints or overloading extraction and power.
In this guide
You plan your cookline for the busiest 30 to 60 minutes, because that’s where delays, collisions, and bottlenecks cost you covers. This guide shows a practical way to map peak menu tasks into a count of simultaneous occupied cooking positions, then allocate them across a coordinated CombiSteel line using:
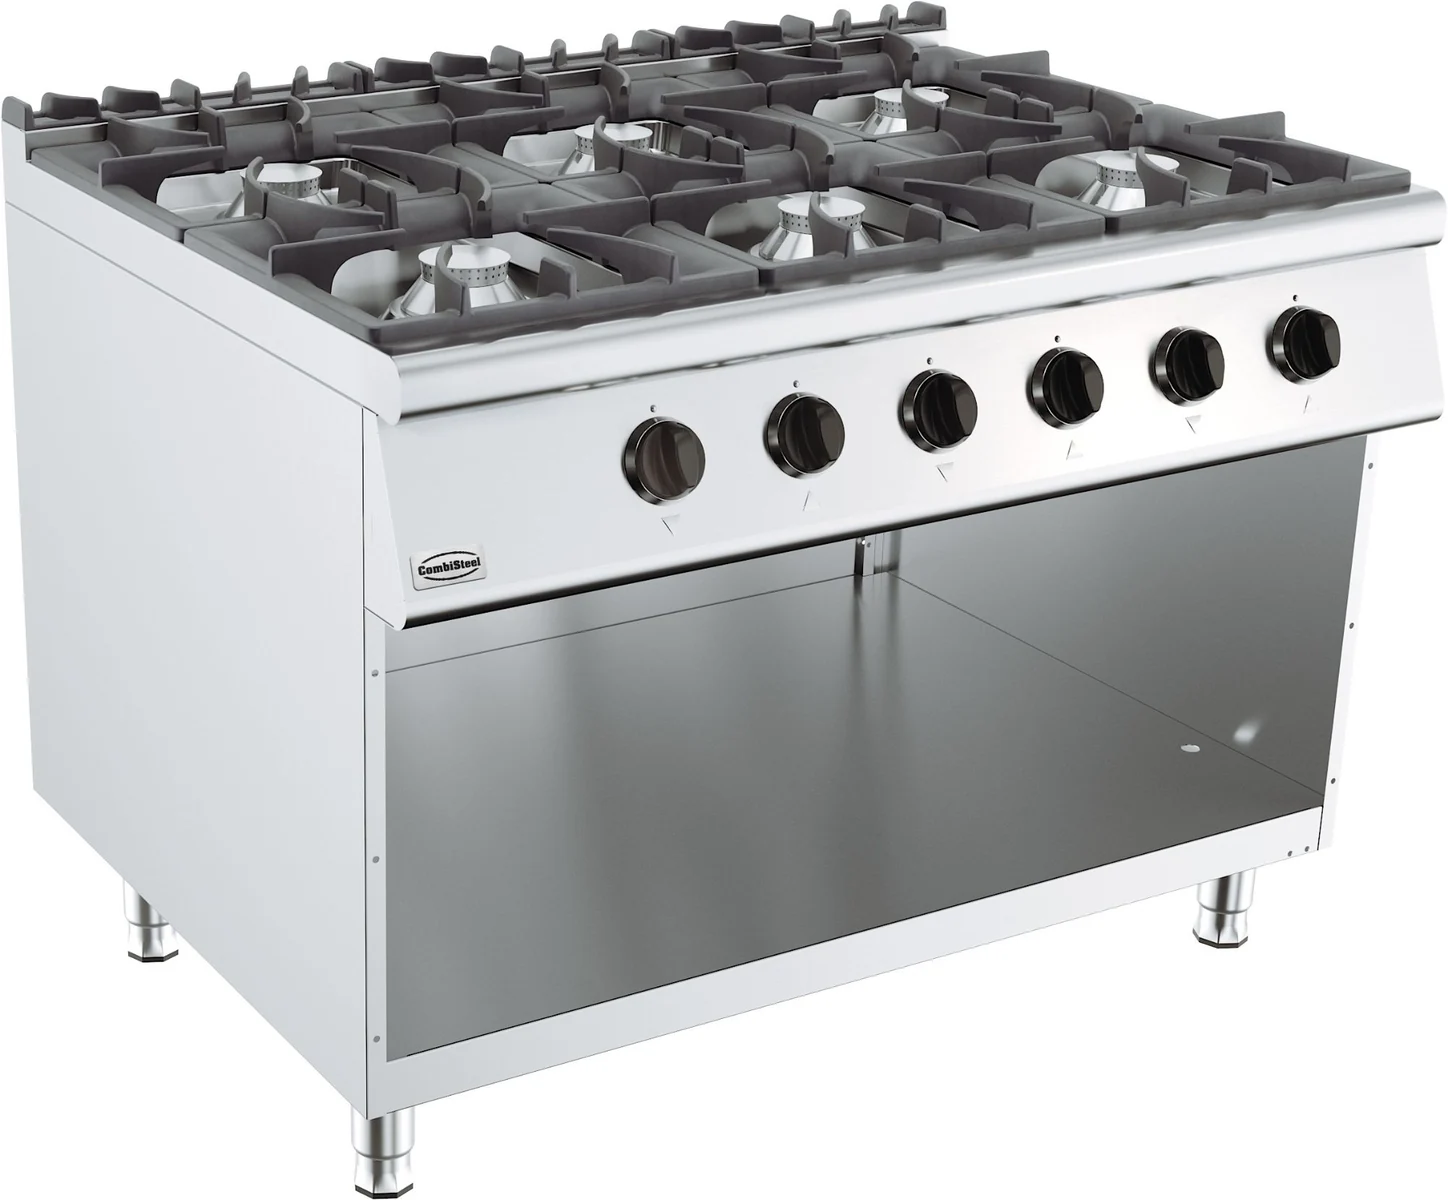
- 7178.3010 six-burner gas range
- 7518.0140 (smooth) or 7518.0145 (ribbed) electric fry top
- 7455.1000 single-tank countertop fryer
The worked example is hypothetical and for layout planning, not a performance guarantee.
Introduction to Peak Cooking Line Planning
Peak planning means designing for the short window when tickets stack and the pass is under pressure, not for the average hour. The aim is simple: make sure the key hot tasks can run at the same time without the team tripping over each other or one piece of kit becoming the permanent choke point.
A simple method you can use
- Pick your peak window (usually 30 to 60 minutes of your busiest service).
- List every hot task that overlaps in that window.
- Convert tasks into “occupied positions”: if a burner, plate area, or fryer basket is tied up and you cannot count on it for the next docket, it’s occupied.
- Ring-fence background work (sauces, reductions, holding, reheat pans) so it doesn’t steal space from to-order cooking.
What an “occupied cooking position” means in real terms
An occupied position is any heat source that’s effectively unavailable during peak because it’s committed to a job, even if it looks quiet.
- A pot reducing is occupied.
- A pan held warm for repeat plating is occupied.
- A fryer basket that’s constantly cycling on one core item is occupied.
That’s why a big range can still feel “full” all night. Half the stations can be booked out by background jobs.
Understanding CombiSteel Equipment Dimensions and Setup
When you’re planning a line, start with the fixed body footprint (the metal box you’re buying). Treat working space and installation/service access as separate decisions for your kitchen designer and fitter.
Body footprint vs working and installation space (keep them separate)
- Body footprint: edge-to-edge equipment dimensions.
- Working space: room for the operator, landing, plating, and safe movement at peak.
- Installation and service access: what’s needed for connections, isolation, ventilation fit, and maintenance.
Those extra allowances are site-specific and not stated in the verified model sources below, so don’t fold them into product dimensions.
Verified fixed body details (from the model sources)
- CombiSteel 7178.3010 Base 900 freestanding gas cooker range (6 burners): (H) 900 × (W) 1200 × (D) 900 mm per the Caterboss listing for 7178.3010.
- CombiSteel 7518.0140 (smooth) and 7518.0145 (ribbed) electric fry tops: 220–240 V, 2 kW, dimensions 360 × 450 × 220 mm (as printed in the manual) per the CombiSteel 7518.0140/0145 user manual.
- CombiSteel 7455.1000 electric countertop fryer: 1 × 8-litre tank, 1 basket, 3.3 kW, 230 V per the Caterboss listing for 7455.1000.
Note on fryer dimensions: A CombiSteel manual for the 7455.1xxx series tabletop fryers is included in the supplied source set, but the verified facts provided here do not include body dimensions for 7455.1000. Treat 7455.1000 as a workflow module (a dedicated fryer position) at planning stage, then confirm its footprint from the supplied manual before you lock in bench lengths and spacing.
Mapping Cooking Tasks to Equipment
Start with what overlaps at peak. Then decide which jobs need the most immediate access and which can sit on steady heat.
1) Turn peak service into occupied positions you can allocate
A useful discipline (hypothetical example used later) is:
- 7 occupied positions at peak
- 3 positions for sauce/holding
- 4 positions for to-order cooking
The number will vary by menu and volume. The separation is the point. If background work keeps invading to-order space, service slows down even if you “have burners”.
2) Anchor the line on the unit that carries the mixed workload
For many kitchens the range is the messy middle: boiling, sauté, simmer, and holding all happen there.
If you’re using the CombiSteel 7178.3010, treat its footprint as a fixed constraint while you sketch stations. The verified body dimensions are (H) 900 × (W) 1200 × (D) 900 mm from the Caterboss listing.
3) Add dedicated stations only where they remove a real bottleneck
Countertop kit helps when it takes a repeat job off the hob and gives someone a clear, owned station.
- A fry top can take over one repeating contact-cook job (breakfast items, burgers, veg sides), so the range stays flexible.
- A countertop fryer can remove the “chips are blocking everything” problem by giving you a defined basket position.
Sanity-check staffing as you go. An extra hot surface without a pair of hands is often just extra heat and extra cleaning.
Choosing Between Smooth and Ribbed Fry Top
The CombiSteel 7518.0140 (smooth) and 7518.0145 (ribbed) are listed with the same electrical input and the same printed dimensions in the manual, so you’re mainly choosing a service style, not a different footprint.
Per the 7518.0140/0145 user manual (p.5), both are 220–240 V, 2 kW, 360 × 450 × 220 mm.
What follows is general cookline workflow advice rather than a claim about any specific plate material or thermostat design.
Smooth (7518.0140): when it typically fits best
Smooth is often easier if peak service involves mixed, smaller items and frequent wipe-downs between products. It also suits kitchens using the fry top as a flexible extra station to stop the range getting jammed.
Ribbed (7518.0145): when it typically fits best
Ribbed is usually chosen for a grill-style finish and for menus where one person can keep the plate fairly dedicated to a narrower set of products. The trade-off is that mixed items and sticky marinades can demand more attention to keep the surface turning cleanly during a rush.
A quick decision check
- Choose smooth if the fry top needs to act as a general-purpose station during peak.
- Choose ribbed if the menu leans heavily toward grilled presentation and you can keep the station more disciplined.
Integrating Additional Modules and Managing Congestion
Extra modules only speed you up when they remove a known bottleneck. Otherwise they steal landing space, create crossing paths, and add heat and vapour exactly where you don’t want it.
Where added modules genuinely help
A small module earns its keep when it pulls a repeatable task away from the main range:
- 7518.0140/7518.0145 fry top: a dedicated contact-cook station with a small body footprint.
- 7455.1000 fryer: a dedicated fry position with 1 × 8L tank and 1 basket per the Caterboss listing.
Where they make you slower
You’re adding congestion (not capacity) if:
- the same chef keeps leaving the range to run another station,
- there’s nowhere safe to land trays or pans,
- plating gets split because the pass is broken up,
- or you’ve created a pinch point where staff are constantly squeezing past each other.
Utilities: use nameplates as an early warning
You don’t need to do full load calculations at this stage, but nameplate inputs are enough to flag when a plan is getting heavy.
- 7518.0140/0145 fry top: 2 kW (220–240 V) per the manual
- 7455.1000 fryer: 3.3 kW (230 V) per the Caterboss listing
If you’re adding multiple countertop electrics, power provision can become the constraint before the menu does. Frying and griddling also change what your extraction has to cope with, so check the knock-on implications early. Use the commercial kitchen extraction planning guide when you’re shaping the brief.
Practical Example Scenario
This is a planning example only. It shows how to convert peak demand into a station allocation without pretending nameplates equal throughput.
Hypothetical peak mapping (7 occupied positions)
Assumption for this example only: you need 7 occupied cooking positions at peak, with 3 steady for sauces/holding and 4 turning over for to-order.
Modules used:
- CombiSteel 7178.3010 six-burner gas range (body footprint H 900 × W 1200 × D 900 mm) per Caterboss
- CombiSteel 7518.0140 electric smooth fry top (220–240 V, 2 kW, 360 × 450 × 220 mm as printed in the manual) per the 7518.0140/0145 manual
- CombiSteel 7455.1000 electric countertop fryer (1 × 8L, 1 basket, 3.3 kW at 230 V) per Caterboss (confirm body footprint from the supplied manual before finalising bench lengths)
One workable allocation:
- Sauce/holding (3 occupied positions): ring-fence 3 burners on the 7178.3010.
- To-order (4 occupied positions): use 2 burners on the 7178.3010 for fast pan work, 1 fry-top position on the 7518.0140, and 1 basket position on the 7455.1000.
Why this tends to work: you stop the range becoming a dumping ground for everything. You’ve deliberately protected background heat, and you’ve created two defined to-order stations that don’t fight for hob space.
If you prefer ribbed: you can swap 7518.0140 for 7518.0145 without changing the printed electrical input or dimensions in the manual (both are 220–240 V, 2 kW, 360 × 450 × 220 mm per the 7518.0140/0145 manual). Your choice is mainly about how you want to run the station during a rush.
If you need more fried capacity, don’t guess
The 7455.1000 is a single-tank, single-basket fryer. If peak service needs two different fried products at the same time, or you need separation for workflow reasons, you can end up queueing on that one basket. The broader workflow trade-offs are covered in the CombiSteel single vs twin-tank fryer guide.
FAQs
How do I count occupied positions without overcomplicating it?
Watch your busiest 30–60 minutes and mark each heat source as either:
- tied up (it can’t reliably take the next docket), or
- available (you can drop a pan/basket on it immediately).
Anything tied up for more than a few minutes, even if it’s “just holding”, is an occupied position.
Should I leave empty burners “just in case”?
Yes, if you’re regularly doing last-minute pan work to save tickets. In practice, the best cooklines keep at least one flexible position that isn’t permanently claimed by stockpots or holding pans. The exact number depends on your menu and how disciplined your mise en place is.
My range is busy but not actually cooking. What’s the usual cause?
It’s nearly always background heat stealing space. If sauces, reductions, and holding pans aren’t ring-fenced, they creep across the range until your to-order cooking is squeezed onto one or two burners.
When does a single-basket fryer become the bottleneck?
When two different fried items need to land at once, or when the fryer is expected to do both core volume (chips) and smaller, higher-margin items (wings, goujons) at the same time. That’s usually the point you either separate products by station or re-think the fried offer.
Do countertop electric modules change my extraction brief?
They can. A fry top and a fryer add heat, vapour, and aerosols right where the team is standing, and that has a knock-on effect on ventilation design and comfort. Sort your ventilation brief early, especially if you’re adding frying capacity. The commercial kitchen extraction planning guide is a good starting point.
Next step: confirm the anchor unit before you finalise the layout
Start by confirming the anchor unit you’re building around, then add the fry top and fryer only where they remove a known bottleneck.
Use the CombiSteel 7178.3010 six-burner gas range on Caterboss to verify the fixed body footprint and spec reference for your layout brief.