
Guides · CombiSteel Knowledge Hub
Balancing CombiSteel Cooking Line: Hobs, Fryers, and Griddles
Optimize your CombiSteel cooking line with balanced hobs, fryers, and griddles for efficient Irish kitchens.
In this guide
When you build a CombiSteel cooking line, the expensive mistakes usually come from imbalance: a high-output fryer with nowhere to land baskets, a griddle that outruns your extraction, or induction hobs that trip your electrical supply at peak service. You want each station to match your menu and your service pace so the line runs smoothly, stays safe, and does not force last-minute ducting or rewiring.
This guide walks you through the practical checks buyers in Ireland make when balancing CombiSteel hobs, fryers, and griddles in one cookline. You will compare tabletop single and double-zone induction options versus gas or electric alternatives, choose smooth or ribbed fry tops based on what you actually cook, and sense-check fryer quantity and capacity against your expected volume. You will also plan a layout that reduces crossing and heat build-up, confirm extractor hood coverage and ventilation needs for a mixed line, and future-proof utilities and spacing so you can add another fryer or griddle later without tearing the line apart.
Understanding CombiSteel Cooking Line Components
A CombiSteel cooking line usually comes down to three core stations: hobs for pan work, griddles (fry tops) for high-output contact cooking, and fryers for consistent deep-fried volume. In an Irish kitchen, how you split work across those stations affects both service speed and food safety. Your HACCP routine relies on getting food through cooking and hot-holding safely and consistently, as outlined in the FSAI temperature control guidance for caterers.
The goal is not “more equipment”. It’s a line that matches your menu and service pressure without creating pinch points at the pass, under the extraction canopy, or on your gas and electrical supply.
What each component does on a real cookline
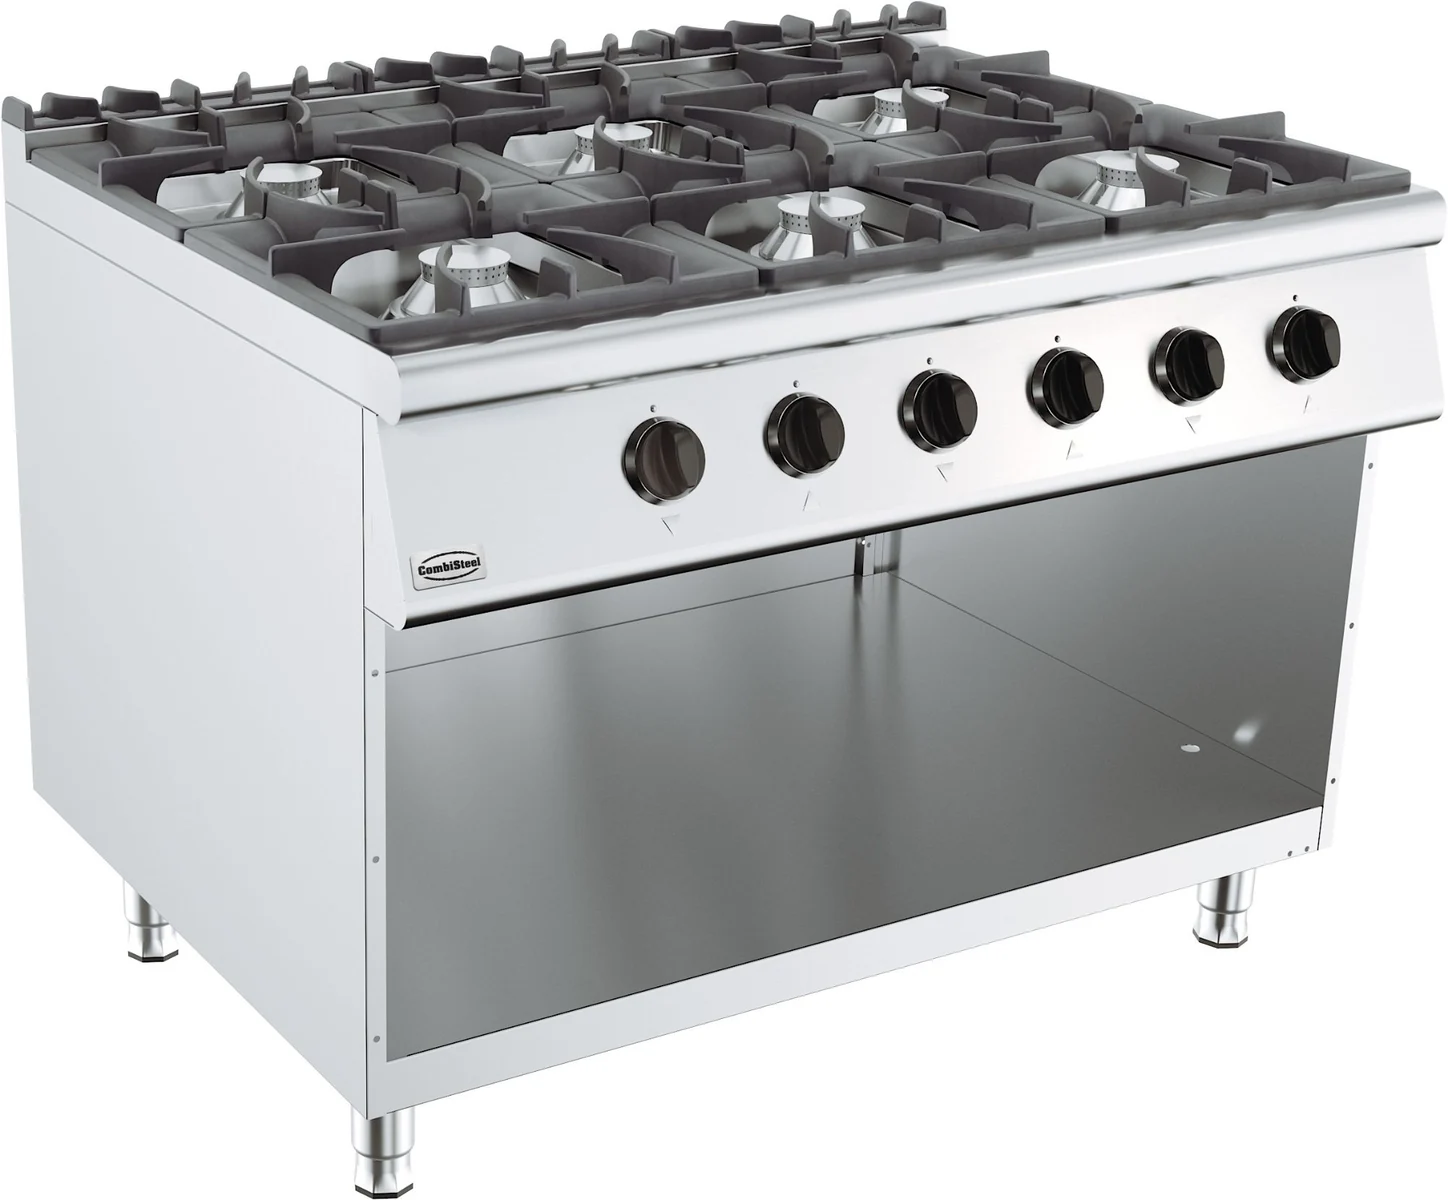
Hobs are your flexible station. They suit jobs that need fast heat changes and a lot of pan movement: sauces, reductions, sauté, finishing, and smaller-batch items that do not justify taking up griddle or fryer space.
Griddles (fry tops) are your throughput station. They give repeatable colour and speed for burgers, breakfast service, chicken fillets, toasted sandwiches, and high-volume items that benefit from direct contact cooking. You do fewer pan moves, which matters when tickets are stacking.
Fryers are your consistency station. When basket space, recovery, draining and holding are set up properly, they deliver predictable output for chips and breaded items. They also bring heat, vapour and a heavier cleaning load, so fryer position tends to be driven by extraction, safe access, and a sensible “wet work” area.
How these parts interact in a balanced line
Balance is about workflow and recovery, not just lining equipment up.
A simple way to think about it is job separation: if the griddle carries the protein volume, the hobs carry sauces and finishing, and the fryer carries sides, you can run two or three chefs without constant crossing. That only works if you allow for landing space, and if fryer work stays away from plating and garnish.
In practice:
- The fryer often dictates extraction and service space (basket lift, drain, salting, holding).
- The griddle dictates cleaning rhythm (scraper discipline, grease management, end-of-service shut-down time).
- The hobs can dictate utilities, especially if you are leaning into higher-power electric or induction.
If one station is out of proportion, it shows up quickly: chefs waiting on fryer capacity while the griddle sits idle, a pile-up of pans because the hobs are undersized, or a messy pass because there is nowhere to land and portion.
Where CombiSteel induction hobs fit, and what they replace
CombiSteel induction hobs are commonly used as single- or double-zone tabletop units where you want responsive heat with less ambient heat spill than an open flame. They can suit smaller Irish kitchens where heat build-up and limited extraction headroom make a gas-heavy line uncomfortable, particularly in summer.
Induction is not a cure-all. You need induction-compatible cookware, and you still need a plan for high-grease cooking, which is often better handled on a griddle or in a fryer. Where induction tends to earn its keep is on sauce and finishing stations, keeping the line calmer and easier to keep clean during busy service.
Getting the right sizes and power ratings is where these roles turn into a cookline that actually keeps up with your tickets.
Choosing the Right Sizes and Power Ratings
Choose induction and fryer capacity by what has to happen at the same time during peak service, not by total covers. Start with your busiest 15 minutes, convert that into how many pans need heat now and how many fried portions need to land per batch, then sense-check it against your electrical supply, gas practicality, and extraction. If the utilities do not suit the kit, the line will struggle no matter what the brochure says.
1. Define peak demand in “active pans” and “fried portions”
Sizing off total covers usually leads to the wrong spend. A more reliable method is to write down what must be cooking at the same time during your busiest push:
- How many pans are live (sauces, sautés, finishing, reheats)?
- How many fryer baskets need to drop per minute, and how many portions must land per batch?
That gives you two usable buying numbers:
- Induction: the number of active zones you need at peak (not the number of appliances).
- Frying: baskets per batch and batches per hour, plus how mixed your docket is.
In a typical pub doing steady mains plus chips, the fryer often sets the pace. In a café doing breakfast and light lunch, hob space and pan compatibility can be the limiter.
2. Size induction by pan reality, not best intentions
With induction, “size” is mostly about how many zones you can keep genuinely productive during service, and whether your cookware suits the zones.
Two checks save a lot of frustration:
- Pan footprint and stability: your most-used pans should sit flat and stable without heavy overhang. Overhang tends to mean uneven heating and fiddly control.
- Cookware compatibility: induction needs compatible bases. Test your real pans early, especially if you have a mixed set across breakfast and lunch.
If your menu needs two pans running continuously (for example eggs plus a finishing pan), a double-zone unit often makes day-to-day sense over two singles because it simplifies counter space, cleaning, and training. Only do it if the electrical supply can support it.
3. Confirm electrical capacity and connection plan before you pick “power”
Induction gives fast, controllable heat, but it shifts the constraint to your electrical infrastructure. Before you settle on higher-powered induction, check:
- What circuits you actually have available
- Where isolators can be fitted
- Whether other heavy loads (dishwasher, combi oven, hot holding) already have you near the limit
Treat electrical work as part of the equipment decision, not something to sort afterwards. Fixed wiring should be carried out by a Registered Electrical Contractor under Safe Electric’s system: https://www.safeelectric.ie/
In older buildings and smaller premises, one “bigger” induction choice can trigger a wider conversation about board capacity and whether you have the right supply available. Better to find that out before delivery than on install day.
4. Size fryers by recovery and basket throughput, then decide: one tank or split tanks
Fryer size is not just litres. In service, what matters is:
- Recovery: how quickly oil temperature comes back after each drop
- Throughput: how many baskets you can turn per hour without soft chips and long waits
- Menu separation: whether you need to avoid flavour transfer and manage allergens
For many Irish pubs, takeaways, and hotel kitchens, two tanks or a twin-basket setup often works better operationally. You can split products (chips versus battered fish, gluten-free versus standard where practical), and you have some resilience if one side is down.
A single larger tank can be simpler to place and sometimes cheaper to buy, but it pushes you into single-product batching and can become a bottleneck when the docket is mixed.
If you are unsure, work backwards from the menu:
- High-volume chips and goujons: prioritise batch throughput and recovery.
- Mixed starters and mains: prioritise split tanks or split baskets so you can keep moving without cross-flavour issues.
5. Utilities reality: when mixing induction with gas fryers makes sense
In compact kitchens, electric induction hobs with gas fryers can be a practical mix: you reduce radiant heat at the chef’s station while keeping strong frying capacity. The trade-off is you are managing both electrical load and gas safety access.
If you are adding gas or changing commercial gas appliances, involve a Registered Gas Installer early. RGII guidance on using a registered installer is here: https://www.rgii.ie/consumers/using-a-registered-gas-installer/
This affects shut-off valve access, any interlocks, commissioning, and how quickly you can get back online after a fault. It is an operational decision, not just compliance.
6. Pressure-test the line against extraction now, not after the canopy is in
Induction can reduce heat spill, but fryers still drive vapour, odour, and grease load. Griddles add even more. If there is a chance you will add a second fryer or widen the hot line later, plan for it now by allowing:
- Physical space and service access
- Spare capacity in electrics and gas where possible
- Extraction headroom, because retrofitting ductwork after the fact is often the most expensive “small change” you can make
Once you have a realistic view of induction zones, frying throughput, and your utility limits, you can design a line that holds temperature and pace under Irish service pressure without backing yourself into a services corner.
Comparing Smooth vs. Ribbed Griddles
A smooth vs ribbed griddle (fry top) is mainly a menu and workflow decision. It affects cook speed, fat handling, smoke, and how much cleaning you take on during and after service.
The key difference is contact area:
- Smooth plates give full contact for even browning.
- Ribbed plates lift food onto bars for grill marks and allow more fat to drain away.
Smooth plates tend to cook faster and more evenly for eggs, pancakes, smash burgers and chopped veg because heat transfer is direct across the whole surface. Ribbed plates suit items where you want visible “grilled” lines and less surface fat contact, but they can cook slower and they can smoke more with marinades and fatty proteins.
How do smooth and ribbed griddles compare overall?
In a typical Irish service, a smooth plate behaves like a production tool. Portion-to-portion consistency is easier, you can zone the plate (hot for searing, cooler for holding), and a wide scraper gets you back to a usable surface quickly between orders.
A ribbed plate is often a compromise when you cannot, or do not want to, run a full chargrill but still want that grilled cue on chicken fillets, veg, sausages or burgers.
Cleaning and hygiene are not a side issue here. Ribs create grooves where carbon and sticky sugars build up, so you will usually spend longer detailing the plate at close and may need more frequent de-carbonising depending on your menu. That is labour, chemical use and downtime to factor in. Whatever plate you choose, your HACCP routine still needs proper cleaning and disinfection of food-contact surfaces as set out in the FSAI guide: https://www.fsai.ie/getmedia/566b0eb9-9a22-414f-9eec-d5405cc6843f/guide-to-good-hygiene-practice-cml-final-2014
Smooth griddles (fry tops)
Choose smooth when sales are driven by speed, repeatability and full-contact browning. Typical wins in pubs, cafés, hotels and busy lunch trade include:
- Breakfast production (eggs, rashers, sausages, black and white pudding)
- Burgers
- Toasted sandwiches (often finished under a cloche)
- Vegetables where you want even colour rather than stripes
Smooth also suits kitchens that rely on quick wipe-downs mid-service. You can scrape, push debris to the grease channel, and re-oil without fighting grooves. If extraction is tight, smooth is often easier to keep predictable because you can manage oil and residue across the whole surface.
Ribbed griddles
Choose ribbed when the selling point is visual finish and a drier surface, for example grilled chicken for salads and wraps, branded veg, or sausages where you want some fat to run away from the food. In smaller kitchens that cannot justify a dedicated chargrill, ribbed plates can deliver a grilled look without adding another piece of kit.
The trade-off is cleaning and controllability. Sweet marinades and spice rubs tend to carbonise in the grooves, which slows you down at close if you have not stayed on top of it during the day. Ribbed plates can also be less forgiving for delicate items (eggs, fish portions, smaller veg) where the bars can mark unevenly or tear the product.
Which is best for you?
- Go smooth if your menu includes breakfast, burgers, pancakes, quesadillas, chopped veg, or anything where speed, full contact browning and fast scraping matter more than grill marks.
- Go ribbed if your menu sells a “grilled” presentation, you want more drainage away from the food, and you can handle the extra cleaning detail and potential smoke from marinades and fat.
- Consider a mixed approach if you are building a balanced cooking line: smooth for production and ribbed for finishing proteins, but only if your extraction and service space can cope.
- If you are unsure, decide based on the bottleneck you are actually fighting: plate space for batch cooking (smooth usually wins) versus customer expectation of a grilled look (ribbed usually wins).
Once you have the plate style right, you can size the griddle properly and sanity-check the electrical load or gas demand against the rest of the line.
Gas vs. Electric: Making the Right Choice
Gas vs electric matters because your utility supply and heat delivery method set the ceiling on what you can realistically install without expensive upgrades. It also affects how predictable your running costs and service reliability will be.
In Irish kitchens, electric (especially induction) is often chosen to reduce wasted heat into the room and tighten control. SEAI highlights induction as an energy-efficiency move away from relying on gas in a commercial case study at the Clew Bay Hotel. The catch is that “efficient on paper” is not much use if your site cannot support the connected electrical load, or if the ventilation plan was designed around a different heat profile.
Utility compatibility in Ireland: what will your building actually take?
For many pubs, cafés and older town-centre units, the decision is driven by what is already in the building, not what you would prefer.
If electrical headroom is tight, adding multiple electric appliances can trigger a supply upgrade. Start by understanding your Maximum Import Capacity (MIC), as it defines what you can draw at the meter. Electric Ireland explains MIC clearly in its guide: What is the Maximum Import Capacity (MIC)?
Gas can suit continuous, high-heat cooking if you already have a properly sized gas supply, but it brings its own scope. If you are on LPG (cylinders or bulk), you need to plan storage, changeovers and safe handling. The HSA sets out employer duties and installation considerations in its Liquid Petroleum Gas (LPG) guidance.
Energy efficiency and running cost: it is not just “gas is cheaper”
The cheapest-to-run option depends on three practical variables you can put numbers on:
- Your load profile: steady simmering and holding versus rapid sear and recovery
- Your tariff: what you actually pay per kWh for gas and electricity
- Where the heat ends up: into the food, or into the kitchen air
Induction puts energy into the pan base, so it typically reduces spill heat. That can make a noticeable difference in smaller kitchens, and it can reduce how hard your extraction and make-up air has to work during peak service.
Energy prices also move. Before you commit to an all-electric or all-gas line based on instinct, sanity-check assumptions against SEAI’s energy price trends for Ireland.
Operational trade-offs: speed, control, ventilation, and service resilience
In day-to-day service, gas gives immediate visual feedback and works with any pan. Induction is fast and precise, but it depends on compatible cookware and on chefs using the zones as intended when service gets frantic.
Ventilation is where many “good on paper” plans fall down. Fryers and griddles are often the big drivers of extraction demand. So even if you go electric on the hob side to reduce radiant heat, you still need to treat the cooking line as one system for ventilation, clearances and cleaning access.
A practical way to decide for a mixed CombiSteel line is to pressure-test it against one checklist:
- If your electrical MIC and distribution board capacity cannot comfortably support the connected load, keep electric for the jobs where control and reduced spill heat matter, and avoid overloading the site with high-kW electric appliances.
- If your gas supply is constrained or LPG logistics are awkward, bias towards electric for most of the line, and keep gas only where it clearly supports the menu and service speed.
- If the kitchen is small or already runs hot, induction and electric can help on chef-side equipment, but you still size extraction around the worst offenders, often fryers and griddles.
- If you need the simplest day-one install, match the line to the utilities already in place, and leave physical and electrical capacity for later additions.
Once you pick a utilities direction, the next step is checking sizes and power ratings so each station pulls its weight without tripping breakers, bottlenecking tickets, or forcing a redesign later.
Creating a Balanced Layout for Efficiency
Most Irish kitchens get faster by cutting steps, turns and awkward handovers between the hot line and the pass, not by adding more cooking kit. The HSA guidance on the Management of Manual Handling in the Workplace is clear that unnecessary carrying and awkward postures increase risk. A poorly sequenced line forces both during peak service.
The catch is that “best” depends on what you sell and how you serve it. A burger-and-chips line wants a different flow to a hotel banquet line, even if the equipment list looks similar.
Build the line around stations, not product categories
Lay out stations the way tickets are built: fry, grill/griddle, sauté/finish, then plating and pass. The goal is simple:
- one chef can complete a ticket without crossing traffic
- two chefs can work side-by-side without fighting for the same landing space or opening the same fridge door
A quick test is to stand at the busiest piece of kit (often the fryer or griddle) and walk the job in your head. Can you receive raw product, cook, season and plate without stepping behind someone or carrying hot baskets across the line? If not, the line is not balanced yet, even if the spec sheet looks fine.
A workable cookline sequence for common Irish venue types
In pubs, cafés, takeaways and hotels, the easiest win is usually keeping the highest-volume, highest-repeat items closest to the pass. Put the messier heat loads (fryers in particular) where staff are not squeezing past with plates.
Use the below as a starting point, then adjust to suit where your pass and extraction actually sit:
- Pub food and carvery support: fryer + griddle/fry top close to the pass; hob or induction for finishing just down-line; ovens further away so doors do not clash with plating.
- Café and brunch: griddle/fry top central (eggs, rashers, pancakes); induction or hob alongside for pans and finishing; a smaller fryer only if chips and add-ons justify it.
- Takeaway with heavy fried volume: a dedicated fry zone (fryers plus dumping, draining and seasoning space); keep the griddle close if it feeds the same orders (burgers, wraps); push slower-cook items away from the pass so they do not block bagging and handover.
- Hotel restaurant with banqueting crossover: separate production from service where you can, so the service line is for finishing and plating while bulk cooking happens elsewhere.
If you are adding CombiSteel induction hobs into a line, treat them as a finishing station unless induction is your main cooking method. They help keep radiant heat down in tight kitchens, but only if you allow proper landing space for pans and clear bench space for mise en place. Without that, you just move the bottleneck to a different spot.
Put landing space where the bottlenecks actually happen
Balanced lines always have a bit of “boring” stainless-steel space in the right places. If you do not plan landing space, chefs will make it out of whatever is flat, including fryer lids, griddle edges or the top of a bin. That is when burns, cross-contamination and dropped plates show up on a busy Friday.
Plan clear landing space near:
- the fryer (draining, seasoning, portioning)
- the griddle/fry top (resting protein, toast/buns)
- the pass (garnish, final checks)
If space is tight, it is usually better to reduce the width of a lower-use appliance (for example, fewer burners you rarely run together) than to sacrifice landing and plating space that every ticket depends on.
Keep heat, splatter and cleaning realities in the layout
Cleaning time is part of throughput. Fryers and griddles generate grease and carbon where it is hardest to ignore, so position them where you can access the sides, rear and floor for daily wipe-downs and weekly deeper cleans without dismantling the line.
Heat matters too, especially in smaller Irish kitchens. Putting fryers directly beside refrigeration, chilled drawers or a cold pass is rarely worth it. You pay twice: staff comfort suffers, and refrigeration runs harder and recovers slower when doors are opened during service.
Design for safe movement and maintenance access, not just “fit”
A line packed wall-to-wall can look neat on a plan and still create downtime when you need to isolate gas, reset a breaker, deal with an extraction fault or service a unit. Hoods, services and fire safety constraints often set the real limit, particularly if you are upgrading to heavier-duty equipment and increasing heat output.
On ventilation and indoor air quality, the HSA ventilation guidance underlines the need for effective ventilation in workplaces. In kitchen terms, that means matching extraction to the actual duty of the line, not just the canopy width in a catalogue.
Aim to keep isolators reachable, allow a sensible services route behind units, and avoid dead corners where heat and grease build up. Once the workflow is right, you can make better decisions on widths, tank sizes and electrical load so the line is balanced on output as well as footprint.
Ventilation and Extraction Considerations
If you’re building a balanced cookline (hobs, fryers, griddles), treat extraction as a core utility. The job is to capture heat, grease and fumes at source, not to “clear the room” afterwards. In practice, Irish food premises guidance expects mechanical extraction over cooking and steam-emitting equipment where it’s needed (FSAI small meat manufacturing plants guide).
The hood has to suit what sits underneath it, especially fryers and fry tops, not just the overall line length. Induction can reduce radiant heat into the kitchen, but it doesn’t remove the need to extract moisture and airborne grease. If you have any gas appliances on the line, you also need to manage combustion products properly.
Treat fryers and griddles as the “extraction drivers”
On most mixed cooklines, the kit that dictates hood performance is the fryer and the griddle or fry top. They generate grease-laden vapour and smoke, which is harder to capture than simple steam, and they load filters and ductwork quickly. If extraction is marginal, you’ll notice it here first: lingering odours, greasy surfaces, and a hotter, more uncomfortable line for staff.
Match canopy coverage to the actual cooking footprint
A common mistake in tight Irish kitchens is fitting a canopy that’s effectively flush with the front of the appliances. Even with a strong fan, capture suffers and fumes spill into the room.
Aim for:
- Full coverage over the hottest and smokiest appliances (especially fryers and griddles).
- Appliances centred under the hood where possible, not pushed to the ends.
- Awareness of cross-draughts from doors, pass-throughs and supply air that can pull fumes out of the capture zone.
Don’t ignore make-up air (it’s why “powerful” hoods still disappoint)
If you extract hard without replacing air, the kitchen will pull air from wherever it can: the front door, dining room, gaps around windows, even down chimneys. That leads to draughts, doors that fight you, and unstable conditions around open-flame appliances.
From a safety and air-quality point of view, local exhaust ventilation is meant to capture contaminants at source and work as part of an overall ventilation plan, not as a standalone fan (HSA ventilation guidance).
Compliance and maintenance: grease management is part of the design
Extraction is not just canopy and fan. Filtration, duct route, access panels and cleaning intervals all affect performance and fire risk. Many Irish contractors and insurers use TR19-style cleaning and verification as the practical benchmark for grease extract systems, so design for cleanability from day one (TR19 guide).
- Confirm canopy coverage over fryer and griddle sections, make-up air provision, filtration type, duct access for cleaning, and whether the approach aligns with Irish building ventilation guidance such as extracting pollutants from cooking areas (Technical Guidance Document F).
Once you know what extraction and make-up air you can realistically deliver in the space, it’s far easier to choose hob formats and power ratings that suit your menu and service volume without overloading services or turning the line into a hotbox at peak.
Integrating CombiSteel Equipment for Future Expansion
Future-proofing a CombiSteel cookline is less about buying “bigger now” and more about leaving yourself options. In practice that means planning utilities, extraction and physical space so you can add capacity later without redoing walls, ductwork or the full line.
In Ireland, gas changes often bring extra design and sign-off steps. Non-domestic gas installations must be completed to the relevant standard, as set out in Gas Networks Ireland’s non-domestic guidelines referencing I.S. 820. The key point is site-specific: a city-centre café with limited electrical headroom will “grow” differently to a hotel kitchen with plant space and a proper services corridor.
Start by future-proofing services, not just the appliances
If you want the option to add another fryer, or move from a small tabletop induction hob to a heavier-duty line later, decide early what you’re standardising on: gas, electric, or a mixed line. Mixed lines are common in Ireland, but they only stay manageable if you plan isolators, connection points and spare capacity from day one.
Isolation access is one of those details that saves real downtime. When maintenance happens (and it will), you want to safely isolate one appliance without shutting down the whole pass. The HSA highlights the importance of isolating and locking off equipment during work in its guidance on work permits and isolation of equipment. In cookline terms, that typically means:
- Accessible electrical isolators for hard-wired items
- Sensible socket positions for plug-in units (so you are not pulling a hot appliance forward to unplug it)
- Clearly reachable gas isolation valves where relevant
Build the line so modules can be swapped and added
Most kitchens get one “proper” refit window. After that, expansion tends to happen in phases, between service, or in the quietest week of the year. The aim is to make the line modular in real life, even when the menu and volume change.
- Leave at least one realistic “growth bay” in the run, sized for a future module (for example, a second fryer, an added griddle/fry top section, or an extra tabletop induction zone on a stand). Make sure the extractor canopy and fire-safe splashback already cover that bay.
- Keep the services zone serviceable. If pipework and cabling are boxed in too tightly, adding one connection turns into a builder’s job.
- Standardise bench and stand heights, and keep proper landing space beside high-output items (especially fryers and griddles). Otherwise you add cooking capacity and simply move the bottleneck to plating.
- If you’re mixing tabletop induction with heavier-duty line equipment, be clear where the “portable” ends and the “fixed” begins, so an upgrade doesn’t force a full electrical rework.
Don’t paint yourself into a corner with extraction and heat load
Expansion usually hits ventilation first, not cooking capacity. Adding a second fryer or a larger griddle changes grease load, vapour and room temperature quickly. If the canopy is only just coping today, you’ll feel the knock-on effects immediately in staff comfort and cleaning workload.
It’s also worth thinking about fire safety early. Changes to ducts, penetrations or canopy arrangements can have compliance implications under the Building Regulations guidance in Technical Guidance Document B (Fire Safety), Volume 1. The practical takeaway is simple: size and position the canopy for the likely “phase 2” line-up, even if you start with fewer appliances.
Plan upgrades around throughput, not just “one more appliance”
A cookline expands cleanly when each station has a clear job and you know what constraint you’re fixing.
- If starters are slow, extra fryer tank capacity might be the right move.
- If mains are backing up because you can’t sear and finish quickly, a griddle/fry top addition or better hob capacity may give you more usable output.
- If plating is the issue, more heat won’t help unless you also create landing and finishing space.
This is where the mix of CombiSteel cooking line equipment matters in a working kitchen. Tabletop induction can be a low-disruption way to add a finishing capability with less ambient heat. Heavier griddles, fry tops and ranges are usually how you add repeatable output when the menu is set and service is relentless. To choose correctly, you then need to get specific about widths, power ratings, available utilities and how much output each station will actually deliver in your layout.
Maintaining Your CombiSteel Cookline
Keep CombiSteel hobs, fryers and griddles consistent by sticking to a repeatable routine: shut down safely, clean while surfaces are still warm enough to lift grease, then do a deeper weekly clean on the parts that affect heat transfer and temperature control. Treat fryer oil management and griddle plate care as non-negotiables. They show up immediately in cook times, product quality and fire risk.
Log what you did and what you noticed, and always isolate power before any internal access or wet cleaning near electrics, in line with the HSA guidance on working with electricity.
1. Shut down safely and set up for cleaning without creating new hazards
Let cooking surfaces drop to a safe handling temperature, then isolate at the switch or isolator rather than relying on the front controls. If someone has to put hands near wiring, elements, panels, or you are cleaning near electrical components, isolation is the baseline step under the HSA’s electricity safety guidance.
For fryers, plan cleaning around oil temperature and access. The HSA specifically flags allowing fryer oil to cool before related cleaning tasks in hospitality settings: see Safe Hospitality Part 2.
In smaller kitchens, treat oil draining and handling hot parts as a two-person task where possible. One person works the unit, the other manages traffic and slip risk. Most “routine” injuries happen when the kitchen is still busy and space is tight.
2. Do end-of-shift cleaning that protects heat transfer and temperature control
On griddles and fry tops, the aim is simple: remove carbon and grease without damaging the surface or leaving residue to bake on overnight. Built-up layers act like insulation. You get slower heat transfer, hot spots and inconsistent browning right when you need repeatability.
Clean while the plate is warm, scrape down, then finish with an appropriate food-safe cleaner. Rinse-wipe thoroughly so you do not carry chemical taint into the next service. That approach aligns with the FSAI’s good practice guidance for cleaning and disinfecting or sanitising food-contact equipment surfaces: FSAI Guide to Good Hygiene Practice.
On induction hobs, keep cleaning controlled: wipe spills quickly, avoid dragging pans, and do not flood the surface or vents with water. Boil-overs and sugary sauces are the usual culprits. Left in place, they turn into stubborn residues and can contribute to surface damage.
3. Manage fryer oil properly and dispose of waste the Irish-compliant way
Oil management is maintenance, not just “quality control”. Skim during service, filter when your volume justifies it, and watch crumb build-up. It accelerates oil breakdown, increases smoke and odour, and adds load to extraction and cleaning.
For disposal, keep fats, oils and grease out of sinks and drains. Irish Water is explicit on this point in its commercial kitchen FOG guidance: FOG reduction and management. Use designated, lidded containers for cooled waste oil and a clear collection process. It prevents blocked drains, greasy floors and avoidable headaches with facilities and landlords.
4. Deep-clean weekly: target the parts that quietly reduce output
Pick one quieter window each week to go beyond “looks clean”. This is where you win back recovery time and reduce callouts. Grease and carbon build-up is effectively insulation, and it also hides leaks and loose fittings.
- Griddles and fry tops: lift and clean splashbacks, corners and grease channels. Check the grease drawer or collection area is seated correctly so it cannot overflow onto hot parts.
- Fryers: clean around and under baskets, check the drain valve area for any weeping, and clean the cabinet base so leaks are spotted early, not after someone slips.
- Induction hobs: clean and inspect air intakes and the fan path area. Blocked airflow is a common cause of nuisance shutdowns in countertop units.
5. Spot early warning signs and decide when to stop and call service
Get chefs into the habit of reporting small changes straight away: slower recovery, cycling on and off, uneven griddle browning, a fryer struggling to hold temperature, or unusual induction noises. In practice, these show up days before a failure, and you rarely have spare capacity mid-week, never mind on a busy Friday night.
If you smell burning insulation, see damaged cables, have repeated tripping, or notice signs of overheating, stop using the unit and isolate it. That is basic electrical safety under the HSA electricity guidance, and it often prevents a manageable repair turning into a written-off unit.
6. Build a maintenance record that supports HACCP and keeps costs predictable
Keep a simple log covering daily cleaning, weekly deep cleans, oil changes and filtering, and any faults noted. Tie it into your HACCP checks so it survives staff turnover and becomes part of normal close-down.
It pays back quickly when an Environmental Health Officer asks what you do in practice, and when you are diagnosing performance issues because you can see when things changed. Once you know the real cleaning time, oil usage and downtime risk for each station, it is also easier to choose cookline sizes and power ratings your team can realistically maintain week in, week out.
Decision Support: Selecting the Ideal Setup
The right CombiSteel cooking line setup depends on where your service actually slows down, not what looks “complete” on a spec sheet. In Irish kitchens, the constraint is often utilities and extraction rather than cooking surface. That is why plenty of fit-outs get tweaked after the first busy season. Your best combination also depends on menu mix, batch size, and how tight your pass and plating space is, so a “standard” sequence can be wrong even in two venues doing similar covers.
Balance the line around your slowest station (not your biggest station)
A balanced line means your hobs, fry top and fryer output are matched so one section is not constantly waiting on another. In practice, the pinch point is usually one of these:
- fryer recovery and basket flow at peak
- griddle space when everything needs searing at once
- pan space and heat control on the hobs for sauces and smaller-batch cooking
A quick sense-check is to work backwards from peak tickets:
- If a big chunk of mains rely on fried sides, the fryer sets the pace.
- If most tickets need searing and finishing, the fry top dominates.
- If you run lots of sauces, reductions and smaller batch work, the hobs become the control point. Adding induction can help here by reducing heat load, but only if you have the power supply to support it.
Choosing induction hobs: size, power, and pan reality
Tabletop induction (single or double zone) is often the tidiest way to add controllable capacity where space is tight and the kitchen already runs hot. The real decision is not “how many zones”, it is how many pans you can run properly at once without clashes. Cramped pan spacing slows chefs faster than a lack of headline wattage.
Induction also forces honesty about cookware:
- Warped bases and mixed-quality pans give uneven heating.
- Wrong base diameter can make a hob look “weak” when it is really poor contact.
If you are only upgrading one part of the line, induction is usually best used for sauces, veg and controlled finishing, while heavier sear and fry work stays on dedicated hot equipment.
Smooth vs ribbed griddles: decide by cleaning time as much as menu
Smooth fry tops are the practical default for high throughput and quicker wipe-downs between pushes. They suit burgers, eggs, pancakes, tortillas and most flat-contact cooking. They also make portion consistency easier when staff rotate.
Ribbed plates earn their keep when you genuinely need grill marks and fat run-off, but they slow close-down. Grooves trap carbon and take longer to detail clean. If you only need “marks” now and then, it can be more efficient to stay smooth and use a ribbed pan or a smaller ribbed section rather than committing your main fry top to a slower clean every day.
Fryers: number of tanks beats “one bigger tank” when the menu is mixed
When you are balancing a line, think in products rather than litres. Chips plus breaded chicken plus seafood in one tank is a common route to flavour transfer, allergen risk, and constant filtration pressure. Two smaller tanks can run faster in real service because you can separate products and keep quality stable.
Also look past the fryer itself. You need:
- landing space for baskets
- a safe routine for draining and filtering
- somewhere to hold chips without steaming and collapsing
If the workflow around the fryer is cramped, the fryer becomes a safety and consistency problem regardless of capacity.
Gas vs electric: decide by the building, not chef preference
A mixed line is common: induction for controllable pan work, with gas or electric fry tops and fryers depending on what your supply can support. The practical constraint in Ireland is often electrical headroom, distribution, and what can be altered safely without major building work.
Treat ventilation as part of the cooking line, not an optional extra. Poor capture and containment increases heat, grease build-up and slip risk. It also drives cleaning and maintenance downtime that shows up in labour and call-outs. The HSA’s ventilation guidance is a sensible baseline to align with early in a fit-out discussion: https://www.hsa.ie/topics/ventilation/.
A “good enough” cookline sequence for common Irish venue types
Sequence is about reducing cross-traffic, keeping the highest-grease work under your strongest capture, and preserving a calm plating zone at the end of the line. If you are planning from scratch, start with one rule: group the dirtiest, greasiest stations together, and keep the highest decision-making stations (sauces, finishing) close to the pass.
- Pub food and carvery-style service: fryer and fry top as the core, with induction supporting sauces, gravies and veg finishing. Prioritise safe landing and holding space for chips and fried items.
- Café and brunch: smooth fry top front and centre, induction for eggs, sauces and small-batch items, and only the fryer capacity you can keep clean and consistent with your staffing.
- Takeaway with a fried-heavy menu: multiple fryer tanks first, then fry top for finishing and assembly. Design for filtering, oil management and safe basket handling, because that is what usually limits throughput.
- Hotel and function cooking: more hob control and griddle space for batch cooking, with fryer capacity sized for peaks rather than everyday covers. Keep flexibility for menu changes and staff rotation.
Utilities, clearances, and “future-proofing” without re-ducting or re-wiring
If you might add another fryer or griddle later, you need space, services and extraction capacity that you are not using on day one. In practice, that means accessible connection points, sensible side gaps for heat and cleaning access, and avoiding a line that can only be serviced by dragging units out and shutting the kitchen.
Food safety workflow is part of this planning too. Your cookline needs to support consistent cleaning and safe handling routines, because Irish operators are expected to maintain a HACCP-based food safety management system in daily operation. The FSAI’s HACCP guidance is the right reference point for that: https://www.fsai.ie/business-advice/food-safety-controls/haccp.
Accessories that genuinely help in compact lines
The best add-ons are the ones that protect space and reduce steps during service:
- stands that put key kit at a workable height
- splash protection where oil and grease are unavoidable
- organised storage (drawers or shelves) so chefs are not walking away from the line mid-service
If your footprint is tight, treat landing space and tool storage as “capacity”. A perfectly sized fryer still loses time if there is nowhere safe to drain, season and plate.
This kind of balancing exercise also helps you choose sizes and power ratings with fewer assumptions, because you will already know what each station needs to deliver at peak.
FAQs: Balancing a CombiSteel Cookline
How do I balance my CombiSteel cooking line so all equipment is correctly sized?
Balance starts with throughput, not just width. Work backwards from your busiest 15 minutes of service:
- List your top menu items and assign each one to its main station: hob, griddle, fryer.
- Estimate portions per peak window (for example lunch rush) and convert that into “station minutes”. If your fryer work adds up to 90 minutes of cooking demand in a 15-minute window, you need multiple fry stations or a higher-output setup.
- Match “fast recovery” stations to bottlenecks: fryers and griddles typically gate your output more than hobs. Oversizing hobs while undersizing frying capacity is a common mistake.
- Check utilities early: confirm available electrical load and gas supply so your chosen mix of induction hobs, ranges, fryers, and griddles is actually installable without costly upgrades.
- Size extraction to the whole line, then sanity-check the cookline depth and layout against your hood plan so you are not forced to downsize later.
If you share your menu, covers per service, and available gas and electrical supply, you can size each station so no single piece of equipment becomes the speed limit.
What are the benefits of heavy-duty CombiSteel appliances in a busy kitchen?
Heavy-duty equipment helps most when service is continuous and multiple chefs share the line:
- More consistent output under load: heavy-duty build is designed for sustained use so performance stays steadier over a long service.
- Better shift-to-shift reliability: fewer interruptions from knocked controls, flexing surfaces, and wear points that show up quickly on lighter equipment.
- Faster, simpler cleaning routines: commercial-grade surfaces and layouts are generally easier to wipe down and reset between services, which protects hygiene and speed.
- Easier to standardise a full cookline: keeping hobs, fryers, and griddles within the same family makes it simpler to train staff, plan spares, and keep a consistent workflow.
In practice, the “benefit” is not just durability. It is fewer slowdowns at peak times and less unplanned downtime over the year.
How can I reduce heat output in a small kitchen using CombiSteel equipment?
To cut heat stress without sacrificing capacity, focus on the stations that radiate the most heat and keep them working efficiently:
- Use induction where it suits the menu: CombiSteel tabletop induction hobs put far less waste heat into the room than open-flame or hotplate cooking because the pan is heated directly.
- Avoid over-wide hot surfaces: choose griddle and fryer capacity that matches peak demand rather than “future-proofing” by oversizing. A larger constantly-hot surface adds ambient heat all day.
- Tighten the workflow to reduce “idle heat”: position fryer and griddle close to plating and holding so doors are not opening, pans are not sitting on heat, and kit is not kept hotter for longer than needed.
- Keep extraction performing: clean filters and maintain airflow. A partially blocked hood makes even a well-sized line feel unbearable.
- Use lids and splash protection where appropriate: it helps contain radiant heat, steam, and grease mist around fry and griddle stations.
If space is very tight, a mixed line using induction for sauté and finish plus a correctly-sized fryer and griddle often feels dramatically cooler than an all-gas line.
Design your CombiSteel cookline layout
Ready to turn these sizing and layout principles into a real plan? Use our interactive configurator to map out your ideal CombiSteel cooking line and see how different combinations of hobs, fryers, and griddles fit your workflow and space.
Once you have a draft line-up, you can sanity-check utilities, extraction needs, and future expansion before you commit to equipment.